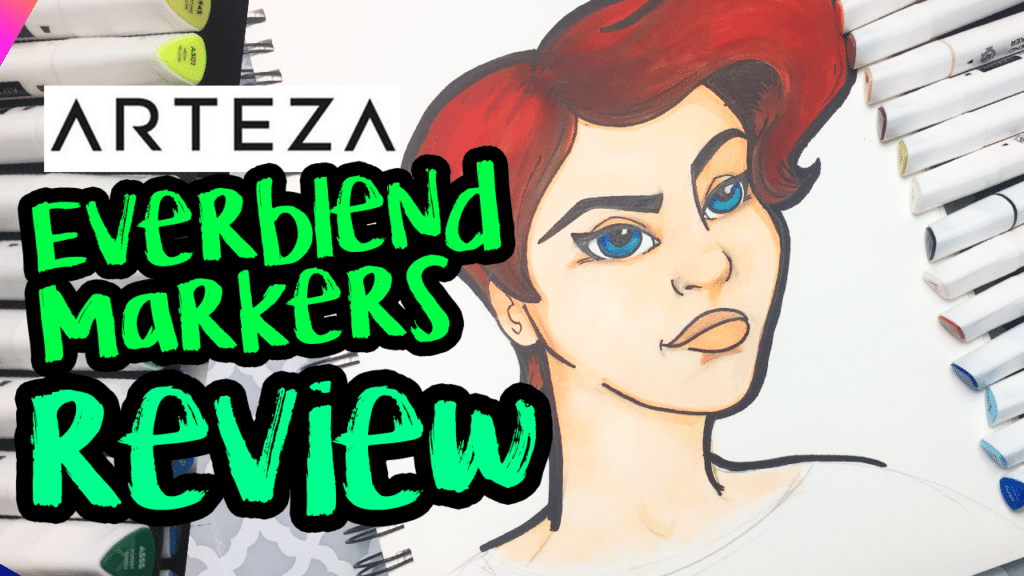
Are Arteza’s everblend markers a good deal? Let’s dive in!
It’s my favorite time of the (month? week? year?) where I test out the newest art supplies from Arteza – this time I will be reviewing Arteza Everblend markers!
In case you’ve been living under a rock this whole time, I have been on a roll reviewing all sorts of art products from the brand Arteza, ranging from acrylic paint, metallic paints, outdoor acrylic paints & wood slices, and paint markers.
And now, I am ready to dive into their Everblend Marker collection – aka the Copic Marker alternative. Will these Copic-contenders leave a big mark on my heart and art? Let’s find out in this full video review!
*Some links used below are affiliate links, which means I will get a small commission if you use these links, at no extra cost to you. I only recommend products I really like and enjoy; so if you want to support me and my blog, use these provided links 🙂 Your love and support is always appreciated.
Click To Get 20% Off When You Spend $75 at Arteza
>>> Click here to check out what Arteza Everblend markers are all about!
Every time I hear the mailman, I get extremely excited. And on this particular day, I was extra excited, because I was expecting a new Arteza arrival! Upon hearing the clink of the mailbox, I bounced out of my house, grabbed the expectant box, and ripped into it.
Inside, I found my 60 marker set with visions of potential cool drawings dancing in my head.
So, with a fever-like enthusiasm, I whisked the contents to the my studio and proceeded to get down to business – to test out and conduct this review.
Although I am not sponsored by Arteza, they did send me these products free in exchange for my honest review. And, your girl will never say no to playing with more art supplies…so I simply had to say yes.
Now, like my previous Arteza art supply reviews, I will be analyzing these everblend markers against a list of criteria – including a swatch test, organization, and functionality, just to name a few.
So, let’s dive in and see what these Arteza everblend markers can really do!
Criteria 1: Organization + Color Selection
The organization of the Arteza everblends was nothing short of miraculous.
The markers are arranged in a suitcase-like package, complete with two red buckles, handle AND shoulder carry belt (extra points for portability).
Inside said suitcase, held together by 3 strips of very secure velcro, the markers unfold almost like pages in a book, with 2 movable flap shelves revealing 60 markers to choose from.
holy cow.
Now, Arteza must somehow know about my organization boners – because their packaging never ceases to disappoint me whatsoever. They are on top of their game!
Each marker includes a broad and fine tip nub for various types of strokes. Now, this is slightly different than Copic markers, which have fine brush nibs instead of the hard tip; however, I did confirm with Arteza that they will be releasing a brush nib for their markers very soon!
I had a lot (and I mean a LOT!) of good feels here, so I will give their organization 5 out of 5.
Criteria 2: Colors
Then, I moved onto the actual colors on the markers themselves.
OMFG!
ok, calm the f down, Amanda.

The everblend marker set includes 59 individual colors and 1 dedicated blending marker; each contain alcohol-based, highly-saturated pigments and are permanent, quick-drying, and non-toxic.
And the really cool part about these being alcohol based is the ability for these colors to blend and layer beautifully with one another.
This means you can lay down one color and have it blend seamlessly with another color. This opens up a BIG door of possibility with your marker art, including creating new color blends and gorgeous shading. Hooha!
In addition, these everblend markers can be used on many different surfaces, including porous and nonporous surfaces like paper, glass, wood, and plastic, just to name a few.
I will say though the after making multiple layers of color on my Arteza multi-media paper, I did notice some pills forming. One way to combat this is to be a lot more deliberate with your color layering and not pile it on so much.
In terms of color selection and pigments, I give them a 4 out of 5.
Click To Get 20% Off When You Spend $75 at Arteza
Criteria 3: Ease of Use
As far as using markers go, using these everblends requires very little setup. Simply grab a marker, open the tip, and start coloring!
Now considering I have never really played with alcohol markers before, I did a few experiments to test out the marker layers and the possible blends I could make.
To my pleasant surprise, it was very easy to get the hang of it.
So here are a few tips I picked up along the way:
- To create a nice shade, lay down the darker colors first in the “dark areas” of your drawing and then build with lighter colors.
- To create a blend, choose colors that are complementary to each other (or close to one another on the color wheel); this will create the best seamless blends!
- To make new color variants, layering colors on top of other colors does the trick! For example, the unique brown color of my drawing’s hair came from layering maroon, red, dark brown, and sienna together!
So, when it comes to usability, I give these a 5 out of 5!
Criteria 4: Swatch Test
Now, every marker cap displays the pigment color, as well as the connection point between the cap and marker body. To test the efficacy of these color indicators, I decided to perform a swatch test, where I compared the actual marker color on paper to it’s marker body.
When I completed my swatching, I noticed most of the colors matched closely with their marker caps, which is awesome. I did notice some colors were slightly darker, but I believe this had to do with me applying multiple layers of that color, thereby making it appear darker.
In terms of swatch matching, I give these markers a 4 out of 5.
Advice for any artist EVER: I always recommend doing color swatching on paper when getting any paint or art medium so you can understand how your color looks when dried on paper. It’s good practice that will only benefit you later.
Criteria 5: Functionality and Application
After those initial tests of these markers, I decided to pull out my Arteza multimedia pad and dive into artist mode and play to test for functionality and application.
I first sketched on the multimedia paper with a regular sketch pencil, and then proceeded to add my pops of color using my markers. At first I was a bit nervous. I was a novice with this medium, after all. It was only now I was dipping my toe into unknown waters. But, after a few minutes, I was blending, layering, and creating “smokin’-hot” colors and shades.
I was pretty impressed!
Each stroke of the marker colors was effortless, and the instant feedback of seeing my blends come to life was simply marvelous. Plus, using the black alcohol marker was AMAZING for creating my cartoon-style, pop art outlines!
Now, there are instances where I saw some snags in the coloring process.
Click To Get 20% Off When You Spend $75 at Arteza
1. Paper Pilling
Like I mentioned previously, I noticed my multimedia paper was pilling a little bit from constant blending with the markers. Of course, I had applied at least 3 layers of marker pigment on top of one another, which can take a toll on the paper. So to help with this issue, you can either switch to acrylic paper or canvas, or if you wish to keep using paper, add colors intentionally and limit the amount of strokes you are placing in one general area at a time.

2. Color Limitations
Considering the world of markers, this one was pretty obvious.
With marker pigments, the majority of the time, what you see is what you get, and you can get a few shades darker with some layering of color. However, of the 60 markers available, I did notice skin tone shades and gray shades were a bit lacking.
UPDATE: Arteza recently released both gray and skin tone packs! These offer a larger variety of color tones to help create color possibilities!
I was able to pull off a more caucasian skin tone, but going any shade darker would have proven to be a real challenge.
But after speaking with Arteza about this, they did inform me that they are “releasing themed packs like skin tones and gray tones” soon to the public, which can directly help address this issue.
I totally give blendability, layering, and overall use, I give them a 4 out of 5!
A Few Things to Note
Refills
If you happen to run out of a certain marker color, you actually can get replacements! Hooray! Arteza offers single color packs of 4 for individual marker colors.
LightFastness
Lightfastness or color permanence has always been a sore spot between Arteza and me, mainly because their advertising says one thing and their labels say (or don’t say) another. The case remains true with these everblend markers.
Simply looking at the marker itself for any signs of permanence is fruit-less (it basically just states the brand name, safety label, and which side the broad and fine tips are located).
Next, I took to Instagram to chat with an Arteza representative, who informed me that there currently isn’t a “lightfast rating on the markers, but we’re working on it!”
soooo, there is that.
Are These Everblend Markers Really Worth It?
There was a lot floating around in my head as I did my test. I had lots of surprises with Arteza’s markers. So let’s recap what I discovered in my testing.
The Good Qualities of Arteza Everblend Markers
**UPDATE**
- Skin Tone Packs are now available
- Gray Tone Packs are now available
- Paint pigments are deep and highly pigmented
- Amount of Color availability is great
- Organization kit is AMAZING
- Pretty comparable to Copics
- Easy to use and draw with.
The Not-so-Great Qualities of Arteza Everblend Markers
- Brush nibs are currently not available
Limited in skin and gray tones
Who are these Everblend Markers are good for?

-If you are any of the following, Arteza everblend markers are the best choice for you:
- A beginner who wants a large variety of alcohol-based markers that is affordable and effective!
- A professional artist looking to add some pizazz or expand their work.
- Looking to get a whole variety of markers for a beginner price
Read More: Acrylic Art Supplies All Beginners Should Have
All in all, Arteza’s everblend markers actually do have quite a bit to offer to many artists on varying levels of experience. Whether you are a first timer or a professional artist looking to mix up your mediums, you can definitely find some value with these markers on a decent budget.
Click To Get 20% Off When You Spend $75 at Arteza
So, there we have it. That is my honest-to-God review of Arteza markers. I enjoyed the whole experimentation process, and I will definitely consider them for other art supplies!
What are you thoughts about my review? Have you tried these everblend markers before? Comment below and let me know!
Related Arteza Art Supply Posts
- Are Arteza Premium Paints Worth the Money?
- Are Arteza Acrylic Paint Markers Any Good?
- Arteza Oil Paint Markers: Meh or Wow?


